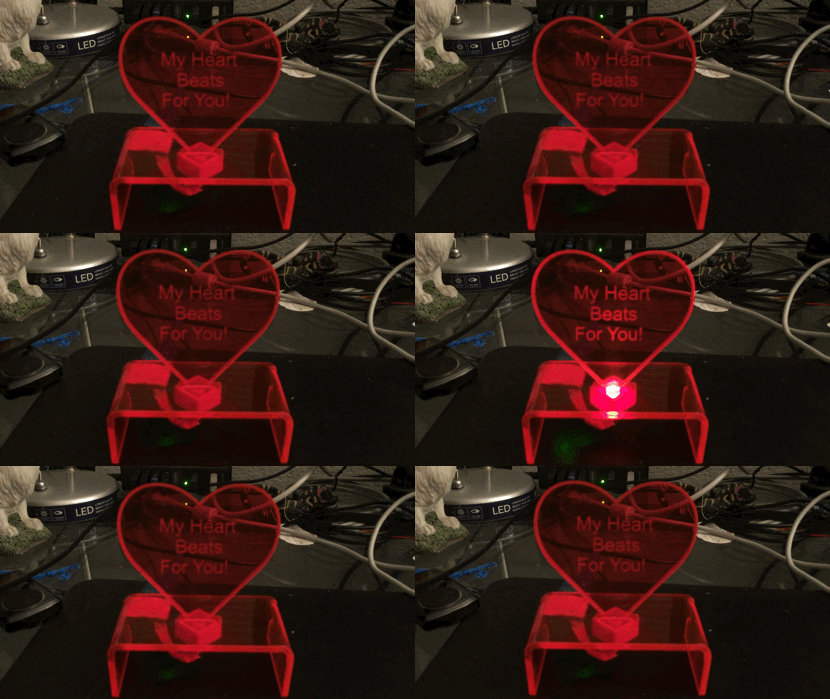
Heartbeat LED
Here's a quick and easy Valentine for someone special, or a gift for a loved one anytime. This is a small desktop stand for a heart-shaped acrylic piece. The heart is laser-etched with your choice of sentiment and lit with an LED that simulates a heartbeat. You'll need access to a laser cutter for cutting and etching the project, or send out to a laser-cutting service such as Ponoko. Some soldering is also required.
Skills:
- laser cutting (or know how to spend money to buy laser cutting)
- crafting/gluing
- heat bending
- very minimal soldering
Parts:
- 12in x 12in x 1/8 in sheet of acrylic, any color - but fluorescent red really shows off the etching; $8.00 at TAP Plastics
- an Arduino-compatible microcontroller; almost any will do: I prototyped on an Adafruit Pro Trinket 3.3v but did the final build on a DigiSpark (ATTINY) board; Adafruit also makes an inexpensive ATTINY-based line of Trinkets
- 1 Lego small "box" piece (with "pipe" column in center) color-matched to your acrylic, as a light baffle for the LED. Or anything you can rig that will block the light from direct view and focus it on the heart point.
- 1 Super-Bright White LED; mine was 30,000 mcd (yikes!); Warning- these can cause eye damage it you look directly into them
- 1 resistor matched to your LED to limit current; mine was 560 or 620 Ohms. Follow the spec sheet for the LED.
- 22 AWG wire, a piece of 4in solid core will do
- Loctite Extra Time Superglue (I also used sugru)
- Optional - a USB extension so you're not plugging and unplugging the device, possibly breaking it
Other:
To make the stand for the heart cutout, you'll need some way to heat-bend the acrylic. Alternatively, you can find some other mount like a small shadow box frame, or make the heart into a pin/brooch. Wear your heart on your sleeve!
Software on github:
- Arduino sketch to blink the LED timed like a heart; original by Paul Badger of Modern Device
- Drawing file for cutting the acrylic
- Download click HERE
Tip:
To get the best refracted light from your heart, etch the BACK side of the acrylic. Mirror your text on the etching so that, when it's turned the right way around, it will read correctly.


Formech Heat Bender with Heartbeat LED Base below heat strip
Assembly:
After you cut your acrylic, you'll need to heat the base/stand and bend "legs" at a 90 degree angle. There are lines etched on the base to help guide you where to heat the plastic and bend it. I used a Formech Heat Bender and an angle jig at TechShop SF to make the bends. On the Formech, heat the acrylic for about 2.5 - 3 minutes after the Formech reaches working temperature. The acrylic will be ready to bend when you can flick the end (closest to the heated etch) up easily with your finger.
Acrylic will move up easily with gentle finger pressure when ready for bending
Immediately place in the forming jig. Press the end of the acrylic up while firmly holding the body in the jig. Keep pressing/holding while the plastic becomes merely warm to the touch, about 3 minutes or so. Repeat heat/bend on the other end of the base.
Load up the sketch on your target platform and test it. You can experiment with changing a couple of parameters to get the heartbeat rhythm you like.
Use a 1/8in drill bit to drill out the bottom of the Lego piece. I used a rotary tool (similar to a Dremel) at low speed and the Lego piece cut very easily. Play around with the placement of the point of the heart through the base slot into the Lego piece, with the LED inserted into the Lego from the bottom and lit. You can hold the Lego in place temporarily with a piece of Scotch tape. I saw best results with about a 20-30 degree tilt backwards in the base, with the the text facing me. Now use superglue to attach the Lego with the drilled side down. Make sure the LED hole in the Lego lines up well with the heart slit in the base. Allow the glue to cure overnight for best strength.
Once set, redo the placement of the heart into the Lego with the LED to confirm - you're going to be gluing this. When you get the desired results, fix at that angle by applying glue where the heart meets the base. In my case, even when fully cured, this didn't feel too stable. So, I added some infill of sugru in the spaces and allowed to cure overnight.
Insert the LED into the glued Lego once cured. Bend the leads of the LED about half-way down so that they can face the place where you're going to put the microcontroller. You can solder the limiting resister directly to the PWM pin you are using on your microcontroller, covering with heat shrink or sugru for insulation. Solder other end to the positive (long) lead of the LED. Then, solder a short piece of wire to GND on your microcontroller and the other end to the remaining (negative/short) LED lead. Test it out again before final attachment of the microcontroller and LED.
LED soldered to Digispark before final assembly
When you're happy that everything works, glue or sugru the micro to the base so it can be attached with a USB cable easily. Fasten the LED in place with glue or sugru. Again, let cure overnight.
Now, enjoy your new beating heart...


Comments
Post a Comment