Back in Black - a DIY raspberry pi Boombox: Make the Frame
The boombox enclosure is a U-shaped frame from 1/4" thick black cast acrylic. The original sheet for this is 18" x 24". I got mine from the local Tap Plastics. That is the largest size material that can fit in the bed of the Epilog Laser 60W I used at TechShop San Francisco, where I fabricated the frame. The cut file in CorelDraw format is in the github repository here.
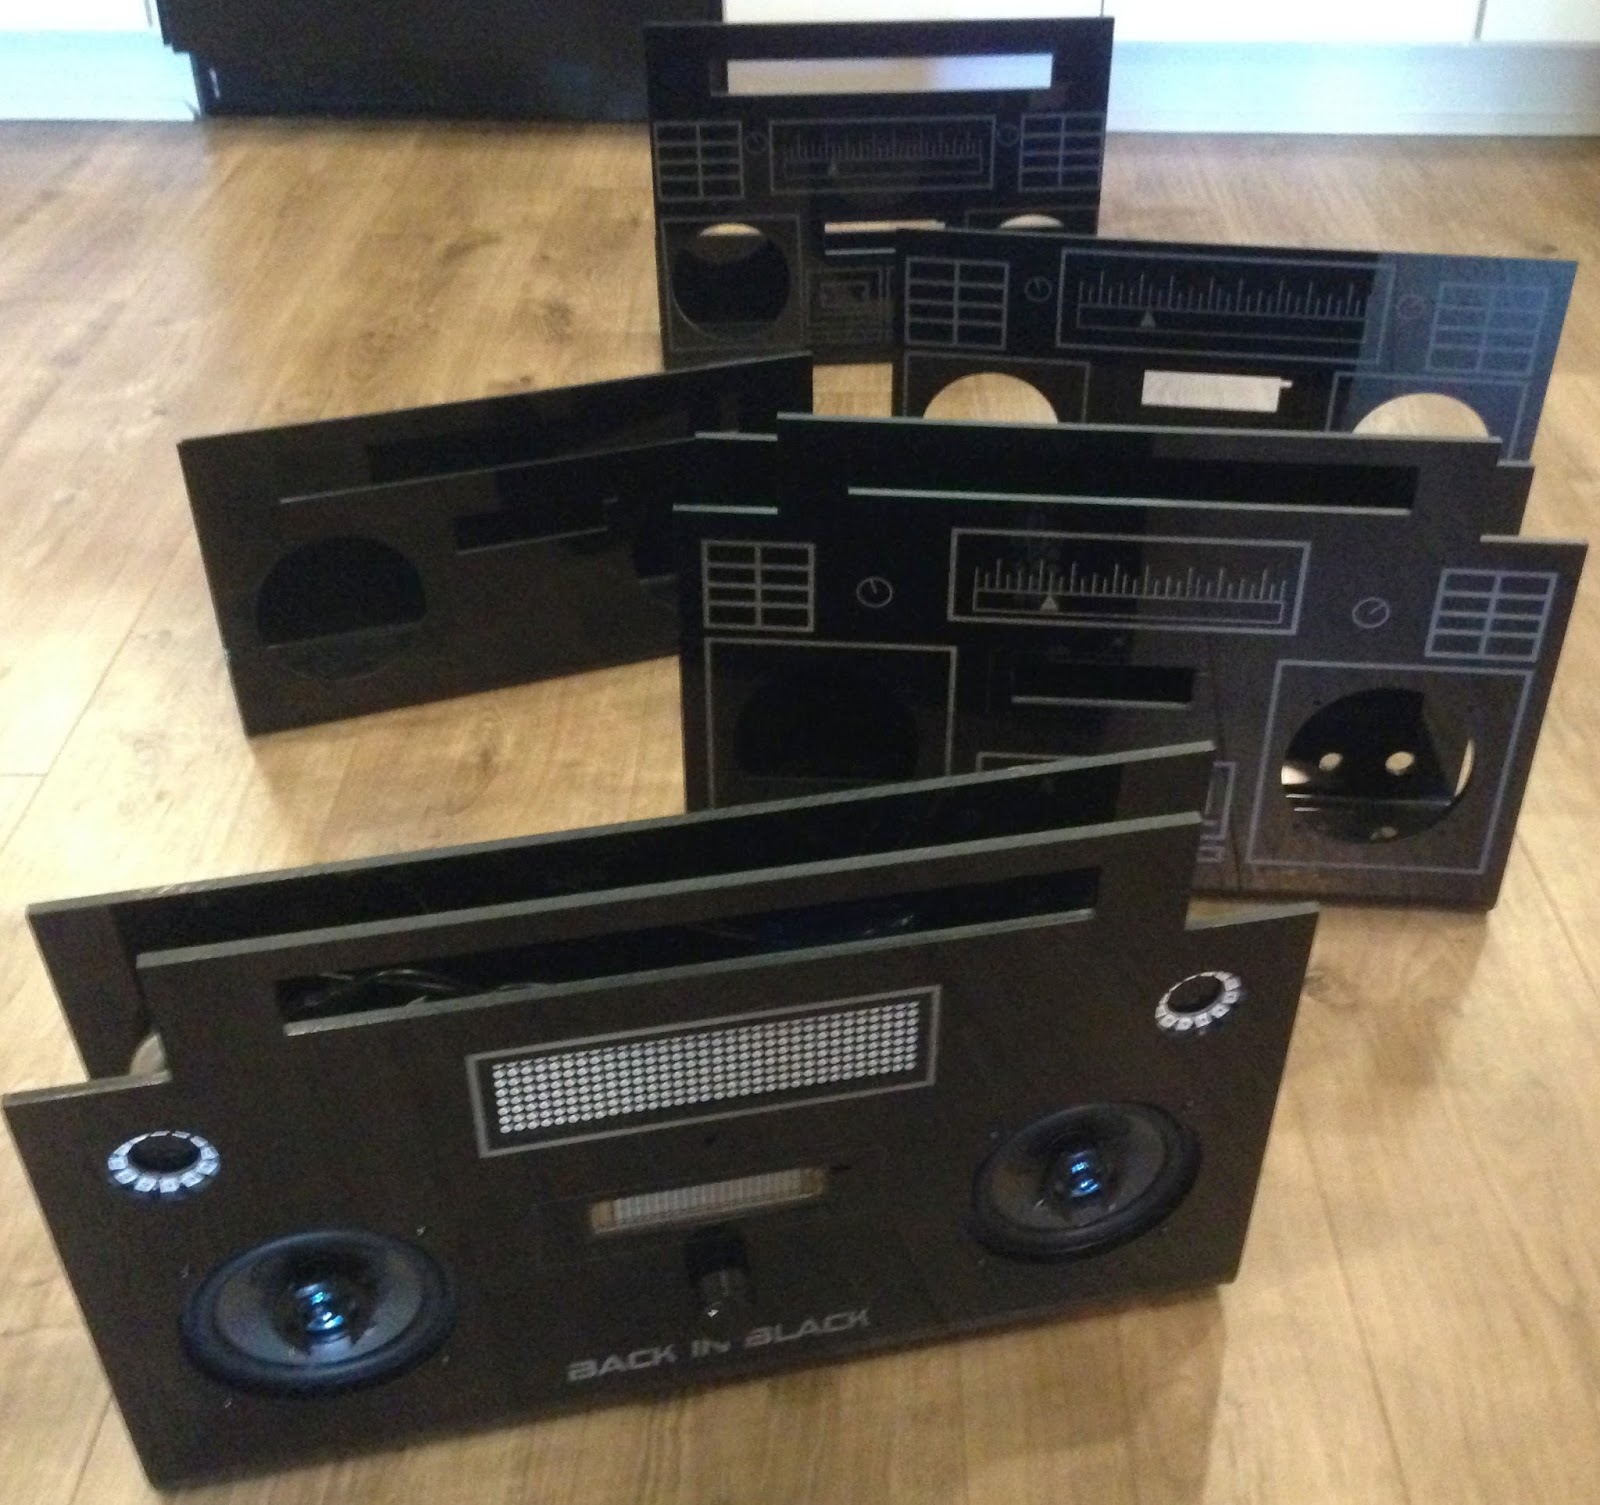
I want through a series of prototypes, from simple to arty, to visualize what I wanted the boombox to look like. In the end, I went with a very clean presentation, with an integrated handle.
If you are using this drawing, always make a test strip of your cuts on scrap material of the same thickness first. This will ensure you get good cuts on your expensive final target material. Laser power may vary from machine to machine, even in the same make/model. That could lead to improper cuts - not cut through. Another reason to do a test strip is to make sure the cut sizes are correct. I like to make test cuts and use my actual hardware to test if size tolerances are correct. Tip: It's a good idea to save your scraps and cuttings for future use.

The file is rotated 90 degrees from vertical (portrait) to conform to the dimensions of the laser bed. At least two copies of each cut are laid down, one on top of the other, in the drawing. This is a technique to make several passes to cut all the way through on each element of a file, useful for laser cutting thicker material. It's an alternative to "printing" the whole file several times. Still, I had to "print" a couple of elements a second or even third time to get a clean cut. It happens... Cut the acrylic with the adhesive masking paper on to reduce smoke smudging.
I used the following settings:
Next, prepare the frame for heat bending into a U-shape by removing the masking paper. I used the TechShop SF Formech FLB500 Heat Strip Bending System, a very nice tool available to members:
 Because of the thickness of the material, I let the Formech heat up for at least 20 minutes at temp setting 5. I had previously etched some guidelines on the acrylic to help position the sheet for accurate bending. The Formech has numbered gradations to help you allign material - just match a guideline to a gradation on each side of the sheet for even heating. You'll want to leave the material in place until the acrylic softens, approximately 3 minutes, but your time may vary. The acrylic is ready for the forming jig when you can easily "flick" up the material edge closest to you: give it a soft push and it should bend up easily. The material will also show a visible sag right at the heat application area when it's ready to be worked.
I heated the material in the Formech twice, for two 90 degree bends. Do the inner bend, closest to the front face of the boombox first. To get the bends, TechShop also had an angle jig:

The angle adjustment knob, shown in blue in the photo, is loosened on both of the two black semi-circles. Then you position the white vertical back to the angle you want to achieve. For thick material like 1/4" acrylic, you really have to exert some pressure on the material in the jig to press and hold it to the desired angle. Four minutes held in the jig should suffice. The acrylic will still need more time to cool completely. When cool, make the second bend, the one that forms the back of the boombox.
Here's a video on the Formech FLB500 in action:
Wire it Up - Power, Next
I want through a series of prototypes, from simple to arty, to visualize what I wanted the boombox to look like. In the end, I went with a very clean presentation, with an integrated handle.
Boombox Enclosure Prototyopes
If you are using this drawing, always make a test strip of your cuts on scrap material of the same thickness first. This will ensure you get good cuts on your expensive final target material. Laser power may vary from machine to machine, even in the same make/model. That could lead to improper cuts - not cut through. Another reason to do a test strip is to make sure the cut sizes are correct. I like to make test cuts and use my actual hardware to test if size tolerances are correct. Tip: It's a good idea to save your scraps and cuttings for future use.
Test Strip Tip: Etch the actual size for different tests (eg;, rotary encoder)
I saved the circles cut out from the switch tests and used them later on. The Neopixel rings have a hole in the center - when mounted, you can look into the nest of wires in the boombox. I used the circles as light baffles mounted on the backs of the Neopixels to achieve a nice, uniform look. More later.
The file is rotated 90 degrees from vertical (portrait) to conform to the dimensions of the laser bed. At least two copies of each cut are laid down, one on top of the other, in the drawing. This is a technique to make several passes to cut all the way through on each element of a file, useful for laser cutting thicker material. It's an alternative to "printing" the whole file several times. Still, I had to "print" a couple of elements a second or even third time to get a clean cut. It happens... Cut the acrylic with the adhesive masking paper on to reduce smoke smudging.
I used the following settings:
- Vector Speed=12, Pwr=90, Freq=5000
- Raster – S=75, P=30 ("Back in Black" logo and heat bend guidelines)
Next, prepare the frame for heat bending into a U-shape by removing the masking paper. I used the TechShop SF Formech FLB500 Heat Strip Bending System, a very nice tool available to members:
I heated the material in the Formech twice, for two 90 degree bends. Do the inner bend, closest to the front face of the boombox first. To get the bends, TechShop also had an angle jig:
The angle adjustment knob, shown in blue in the photo, is loosened on both of the two black semi-circles. Then you position the white vertical back to the angle you want to achieve. For thick material like 1/4" acrylic, you really have to exert some pressure on the material in the jig to press and hold it to the desired angle. Four minutes held in the jig should suffice. The acrylic will still need more time to cool completely. When cool, make the second bend, the one that forms the back of the boombox.
Here's a video on the Formech FLB500 in action:
Wire it Up - Power, Next

Comments
Post a Comment