Update: Makezine MonoBox Speaker
In an earlier post, I showed the LM386 amp I made from the Makezine tutorial. This post covers the actual speaker build.
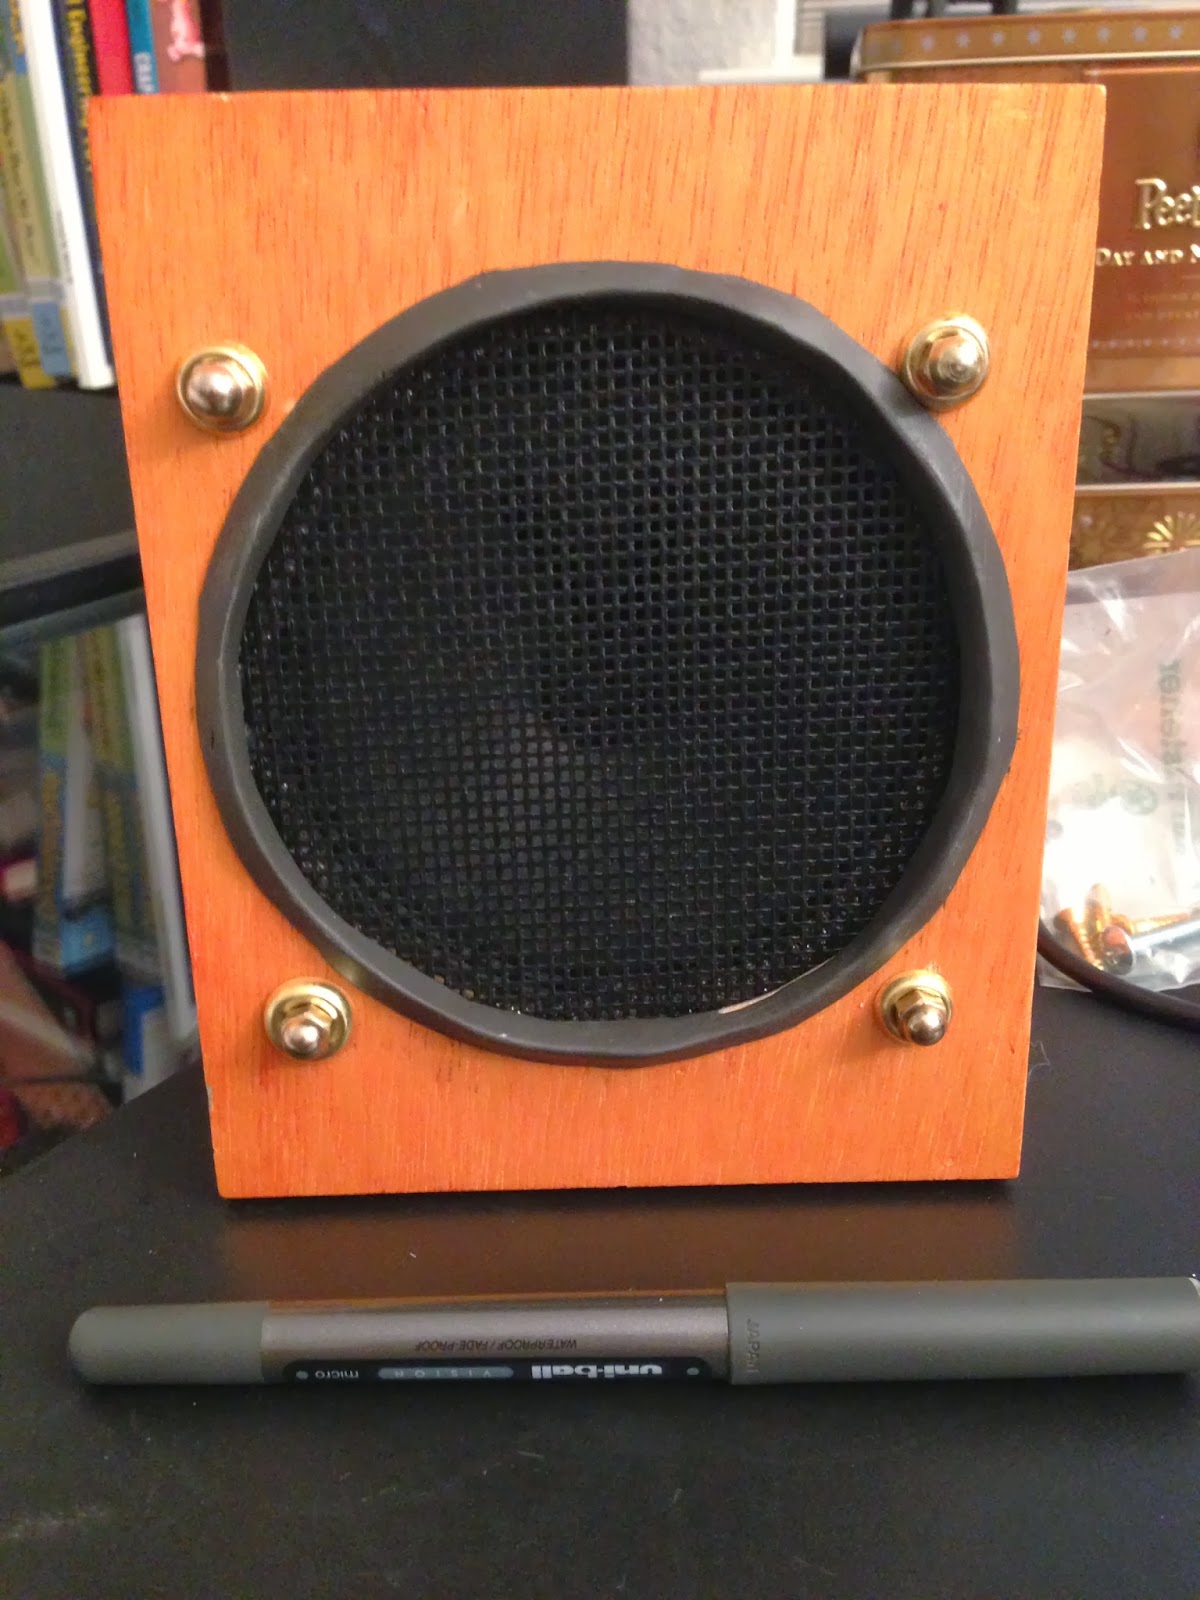
I used a small wooden "cigar" type box with a loose lid that held some kind of Tommy Bahama product. I followed the Makezine MonoBox instructions and used a dremel to cut out a circular hole for the speaker, after first tracing the speaker onto some paper. The result was pretty rough and ugly, with some wavy spots and some flat spots. Didn't like that at all.
I was casting about for some kind of covering to hide and smooth out the edge of the hole. First tried glueing split heat shrink but that was a disaster - it didn't take curves without kinking up and didn't glue well. What I finally hit on was using sugru, an old go-to tool for me. I shaped the sugru around the edges and gave the top a kind of a peak with a slightly inward tilt. While still not perfect, this gave the edges a more finished like, as if a gasket had been applied.
I liked the original build idea of using brass finishing washers. It turned out that when I drilled the holes for 4/40 screws to hold the speaker in, the exterior wood splintered horizontally. I needed something to cover that and the washers worked prefectly. I also found some size 4 brass acorn nuts that worked nicely on top of the washers and made it more interesting.
I drilled a hole for my 2.1mm ID barrel power connector and 1/8 inch audio input on the side of the box. I don't really know why I preferred the right side of the box instead of the back. Guess it's because I'm right-handed and hold the box steady with my left while I insert cables.
When I tested out cable inserts, I realized that I hadn't accounted for the thickness of the box walls, about 1/4 inch. This meant I had to attach a longer 2.1mm barrel connector to my battery holder to make good contact. It also meant I didn't have enough space to attach the nut for my 1/8 in audio connector. So, both the power connector and the audio connector were hot glued in. I held the pieces in place with their connectors inserted to get proper alignment for the holes.
With the speaker installed, the top fit loosely on the base and could easily tilt from one side to the other, wouldn't stay level. To seal the lid in level, I used hot glue, first applying it to the problem side and letting it set. Then I went after the opposite problem side (the tilting side) and did the same, letting it set. Finally, I glude the other two sides at the same time, taking care to lay down an even bead of glue and covering any gaps between the lid and the base.
I have yet to figure out how to put a handle on this box. I bought some nice satin nickel handles for $4 US but their screws were far too long to attach to this small box. I didn't have any shorter screws with the same diameter. I tried glueing the handle in place, but it just wouldn't take.
Even without the handle, the box looks good. And, it ROCKS!

Comments
Post a Comment