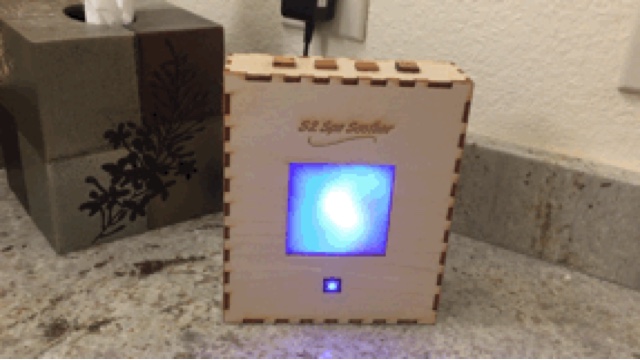
S2 Spa Soother
Nowadays, the go-to tools for signaling a change or alerting us to a condition are lights and noises. This is a project that explores the softer, calming side of electronics. The S2 in the title refers to "sights and sounds". But here the sights are mellow, colorful patterns and the sounds are relaxing nature and environmental tracks. You can have four different sound tracks, all switchable at the press of a button, for whatever your mood. Just imagine yourself chillin' in a warm bath, or daydreaming under blankets to peaceful sounds and slowly changing patterns of light.
Level
Difficult: Although the finished project is physically small, there's a lot going on here. There's both a RainbowDuino AND a Raspberry Pi Zero in the build. You'll need to either laser-cut a box (plans supplied on github), or find a suitable pre-made box. Just the laser-cut box is covered in this post. Sound will require soldering components or using a small breadboard. Alternative to the sound build given here is an HDMI to VGA/3.5mm Audio adapter such as this one, $11.99 on Amazon. I did not test this out because I thought the cable and adapter would take up too much space in the small box I made. However, it "should" work...
The laser-cut box is small in order to have a nice little box. That means that space is very limited inside for mounting components and routing wires. Plan your build and think about what you are doing, even using this post as a guide.
You'll have to cut the pre-made box for the diffusion lens and various buttons and speaker. A pre-made box needs to be an appropriate depth for your set-up, so you see soft patterns and not individual LEDs. There's a post by Gilad Dayagi about a plasma system (no sound) using an 8x8 RGB LED Matrix, which was an inspiration for this build. If you don't need sound and want an easy build, stop here and go to the excellent instructable by giladaya.
Gilad says about the diffusion:
"Note:
I picked the length of the standoffs to be 15 mm after some experimentation.
According to your specific diffuser material, you may need a different distance - experiment to get the best results."
If you use a box of different dimensions from either giladaya's version or mine, or perhaps a different diffusion material, you'll have to test for desired results.
Skills
- Laser Cutting and/or craft work cut/glue etc.)
- Soldering
- Able to read schematics and translate them to circuits
- Optional: Cutting circuit board (perma-pronto); makes assembly easier
Parts
- A RainbowDuino from seeedstudio $21.95 from Amazon
- RGB LED Matrix like the Geeetech available for $6.95 from Amazon
- Common Anode 8x8 Matrix
- Note - the LEDs in this build are not reacting to or changing with the sounds, they are changing patterns independently.
- Raspberry Pi Zero for Sound Output $5.00, but supply is limited at the moment
- Breadboard/1/2 sized Adafruit PermaProto Board
- will be used as a base for buttons, and optionally other component mounts
- Components for PWM Sound
- Caps: 2x 0.01uf and 2x 10uf
- Resistors: 2x 270 Ohm and 2x 150 Ohm
- LM386-based audio amplifier: build your own from Dean's instructions like I did, or buy a cheap pre-made amplifier like this one: $4.14 on Amazon
- Dean has a full list of components in his post
- I added components to filter out noise:
- (1) 1N4001 Diode
- (1) 470uF Capacitor
- Visaton 2in K50 8 Ohm Speaker was plenty loud! Parts Express $2.52
- Wooden Box from craft store < $6.00 *NOTE: Depth is critical for diffusion effect!
- Cut your own box with a laser - 12in x 12in x 1/8in craft plywood < $6.00 (plans supplied)
- I used a light diffuser plastic from TAP Plastics, under $6.00/sq ft
- 12mm x12mm momentary switches from Adafruit $5.95
- 4x 12mm/0.5in stand offs (length could change dependent on your box depth) for RainbowDuino
- 4x 12mm/0.5in stand offs for Raspberry Pi Zero
- 8x 4/40 0.25in/6mm screws for holding Rainbowduno to standoffs
- 8x 4/40 0.25in/6mm screws for holding Raspberry Pi Zero to standoffs
- Titebond II Wood Glue - 8 oz < $3.00, Amazon/Ace Harware/etc.
- Clamp(s)
- Super Glue
- Optional Right-Angle Header for RainbowDuino connections
- Optional (2) 6in length Male to Female jumpers for Right-Angle Headers
- 40 ct female header for the Raspberry Pi Zero
- Optional: 40 ct female header, makes it easy to connect all the wires to various components
- 22 AWG hook-up wire, solid core; various colors help differentiate connections
- 2.5mm Panel power jack
- Optional on/off momentary switch (as built uses this) plus 1 current limiting resistor (mine was 100 Ohms) for the LED in the switch
- Requires (2 pieces) 3-pin Right Angle Header
- (2) Female-to-Female Jumpers to connect to pin D3 and GND Right Angle Header on RainbowDuino
- (2) Female-to-Male Jumpers to connect to Pololu (below)
- Optional pusbutton power switch (controller) from Pololu $3.95 (as built uses this)
- 9V Power Supply from Adafruit,$6.95
Software
- Arduino IDE 1.6.4 or above
- Audacity for Windows/Mac/Linux
- Raspbian Jessie for the Raspberry Pi
Available on github:
- My github has the following -
- Python script for controlling sound clips
- Laser Cut wooden box files CorelDraw/SVG/PDF
- My version (with a few changes) of giladaya's Particle system sketch: S2_Spa_Soother_Spin.ino
- Sketch for original Particle System (aka plasma) LED effect - giladaya's github
Other Resources
- MakerCase generator for box laser cut files
- Epilog Helix 60 watt laser or Universal Laser, TechShop San Francisco (Priceless! JK...)
Process
- Build the box - Part 1
- Optional - Custom "Relief" Buttons
- Assemble the diffuser panel
- Glue the box partially together
- Use Audacity for sounds
- Convert to Mono
- Amplify
- Repeat
- Wire up the circuit
- Install code and test
- Final assembly: Build the Box, Part 2 (attach components)

Comments
Post a Comment